Creating a document database
The first thing you must do is create a database of documents. The contents of the database may include your own work, for example articles that you have written in the past. Or, if you’re a teacher, you might add your past students’ term papers or homework to the database. You can also add reference materials that you use for research, to ensure that you don’t accidentally copy text directly from your sources. To add documents to the database, follow these steps.
- Click on the Database Manager button in the toolbar. Or, select Database Manager from the Tools menu at the top of the screen. These actions will open the database manager.
- Click the Add Documents button. Then, from the window that opens, navigate to the documents that you would like to import. If you select a folder, Novus Scan search inside the folder and any subfolders that it contains, and find document to import into the database. Novus Scan can read the following formats: plain text (TXT), rich text (RTF), portable document format (PDF), Microsoft Word (DOC), hypertext markup format (HTML, HTM), and Safari WebArchive format (webarchive).
- While selecting files, you have the opportunity to add comments to the documents that you are importing. Use comments to organize the documents in your database. For example, you can add comments to indicate the author of a set of documents or the name of the client for which they were prepared. Comments can also be added or changed after importing documents. Note: You can also drag files directly from the Finder into the document list.
- While Novus Scan imports the files into the database, a progress bar will be visible at the bottom of the screen. You can stop importing the files at any time by clicking the ‘X’ next to the progress bar.
- When you have finished importing documents, click the Close button to close the database manager and return to the main window.
Scanning documents
After you have prepared the database, you’re ready to start checking documents for copied text. Here’s what you need to do to scan a document:
- Click the Add Documents button on the toolbar.
- Navigate the to the document that you would like to scan and click the open button. Novus Scan will import the document’s text.
- Click the Start Scan button on the toolbar. A progress bar will appear, showing you that the scan is being conducted. To cancel a scan that is in progress, click the white ‘X‘ next to the progress bar.
- When the scan is finished, The main window will display the results navigator.
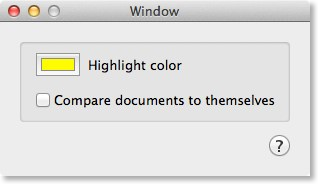
Note: If you scan a document that is already in the database, the matches are ignored. You can enable the display of these ‘self matches’ in the Preferences by checking the “Compare documents to themselves” check box. After enabling this feature, you have to re-scan the document for the self matches to become visible.
Viewing the results of the scan
The scan results navigator is split into three panes. On the right, you will see a list of documents that contain phrases that match the document that you've scanned. the number to the right of each document in the list indicated the number of matching words that were found in the document. The upper pane contains the text of the document that you have scanned. The lower pane contains the text of the matching document selected from the list in the right pane. To navigate through matches in the document, follow these steps:
- Select a document from the list on the right side of the screen. The text of the selected document will be displayed in the lower pane. Both the upper and lower documents will be highlighted to indicate the locations of matching text.
- Click on a highlighted phrase in the upper pane. The bottom pane will automatically scroll to reveal the corresponding matching text. The matching text will also momentarily flash to indicate its location.
- Click the file name at the bottom of the window to reveal the location of the matching file in the finder.
- Double click the file name in the list on the right side of the screen to reveal comments that you added to the document in the Document Manager.
Printing reports
You can prepare a report of the scan results, which you can print or save in PDF format. The report generator can be accessed by the button on the main toolbar. Within the report generator, you can select which matching documents you want included in the report, and you can filter the list by the minimum number of matching words. When you are ready to save the report, click the Print button. On the following window, click the PDF button to save the report in a PDF file, or click print to send it to the printer.